Sketchbook #1

Despite the numerous unfinished sketchbooks, this January I started a new one. I had a new project in mind, and the current deal “no new sketchbooks until all the others are completed” wasn’t really motivating me anymore, if not holding back my creativity.

Moreover, my brother and his girlfriend bought me a new sketchbook this past Christmas, so really that was just an excuse to use it!

I’ve also decided to start labelling my sketchbooks. At first I thought of numbering them all, including completed and unfinished ones, but as I’m giving myself a new start this year, I went for starting afresh and begin from #1.

I’ve written a bit about this little project before (here), but I will be using Sketchbook #1 for themed drawings/illustrations/watercolours, mainly taken from two little books I recently bought: 20 ways to draw a tree and 20 ways to draw a tulip.

Over the past month, I focused on trees shapes and illustrations, covering various styles and seasonal palettes. The idea is to get practising on nature subjects that I like, and to make a painting at the end of the month using what I’ve learned.
I’m still drawing sketches for the final piece, but given the fact that I don’t have much spare time to paint, I want to make sure that I’m actually creating something that I like, rather something just because.

This month I will be focusing on flower bulbs. The subject is actually not covered in any of the books I mentioned above, but I was really inspired after seeing my flower bulbs starting to sprout. And I already have a plan for the final painting. It is true when people say the more you create, the more you get inspired! 

October in doodles

At the beginning of the month I joined a doodle a day challenge created by the talented ellolovey. There are plenty of these type of mini projects over the internet, but this one seemed fun and also some of my IG friends were doing it too.

I made myself a teeny tiny sketchbook using a collage cover I made about a year ago and never used, 32 pages of watercolour paper and a 25mm ring. I printed out the October list, glued to the first page and I was set to go!
 

You can find the overall set on my Flickr page (here) or on Instagram (here) with the #doodleadayoct tag.
If you fancy join in for the November challenge, click on the November list. Happy doodling!

DIY Rubber stamps

 
A few weeks ago I came across a beautiful and captivating book on rubber stamps. The front cover was enough to make me buy it, and after flicking through the pages I was totally hooked. The book is Geninne D. Zlatkis “Making an impression”, and it’s about making your own rubber stamps, with lots of tutorials, ideas, templates and so on. She gets inspiration from nature and translate her interpretation of it into beautiful stamps.

The process of rubber carving is quite straightforward, as long as the design is simple and not too intricate. There are many tools and materials available, of higher quality and more professional than the ones I used, but as I didn’t want to wait, I just used what I had handy.
This is what I used to carve my own stamps.

  • small cutting mat
  • some scrap paper to try out my designs
  •  HB pencil
  • craft knife ( I used a Jakar swivel knife)
  • retractable knife
  • Some plastic erasers
  • ink pads in various colours

The first thing I did, was to ink the eraser surface, let it dry for a few minutes, gently wash it with water and let it dry again. This preparation process will become handy when cutting the design.

While the eraser surface was drying up, I tried various designs on a piece of scrap paper, bearing in mind the size of my plastic erasers. Once I was happy with the design, I copied it onto the eraser’s surface. This is the easiest way of trasferring your picture. For more complicated ones, I would suggest using tracing paper.

Using the craft knife, I marked the outline of my design and with the retractable knife I started cutting deeper and taking out the rubber around the picture. This is the most delicate part of the entire process; the more careful you are, the better your rubber stamp will be, especially if you are dealing with round surfaces. The coloured surface of the rubber will help showing the cuts. Now, the best way of doing this would be to use a lino cutter tool, if you have one.
You can try out your stamps during the cutting process, to see whether you need to cut more or make adjustment.

Once you are happy with the results, just ink it and start stamping. I’m telling you, it’s addictive…I’m stamping everywhere!

On a sunday afternoon

The good thing when my little falls asleep in the car, is that I have time to sketch, read and do all the relaxing stuff that would otherwise be neglected and replaced by cleaning, tidying up and so on. As long as I have what I need with me, which is fortunately 99% of the time, I enjoy these rare moments very much.
Yesterday afternoon, we were on our way to Heathrow airport to pick up a certain someone from his weekend away in Rome…
We left home early, she felt asleep, so I stopped in a residential road nearby the airport and did some sketching. Apart from the constant noise of plane engines (I do wonder if people who leaves here are used to it!), it was a perfect sunny afternoon.

My current notebooks

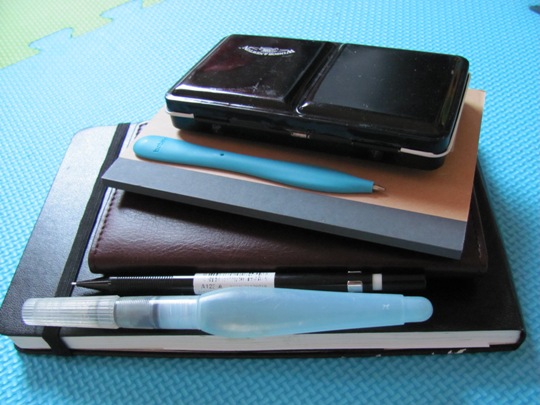
What I’ve been carrying around lately
Every year, around December time, I start planning the essential kit for taking notes, writing down appointments, sketching, etc that I will be carrying around the following year. It’s a process that I’ve been doing for years and that I still enjoy very much. What I normally do, is going through my diaries/notebooks/paper pads that I’ve used during the year and make a decision on what has been essential or superfluous, what has been useful and what hasn’t. Over the years I have found some combinations of diary/sketchbooks that have worked very well for me; my very minimal kit consists of a pocket size weekly diary and a small sketchbook, with some variations.
My favourite diary is a black soft cover pocket size Moleskine weekly notebook. I love it, because it has the weekly calendar on one side and a blank lined page on the other, which is great for taking notes, making lists, write down thoughts, etc.
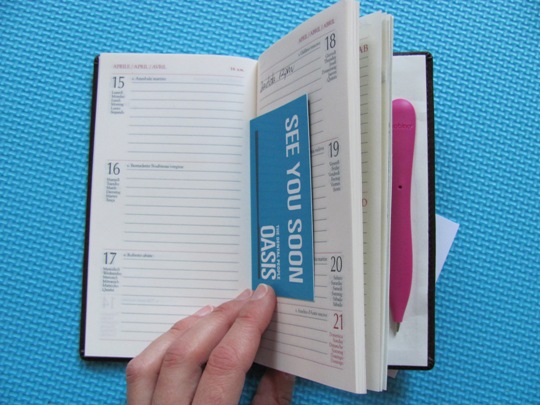
But I like to make some changes once in a while, so this year I decided to use one of those complimentary diaries that my auntie receives every year from pharmaceutical companies (she’s a nurse). The size is the same as the Moleskine, although inside is slightly different as the weekly calendar is spread on two pages.
Inside I’ve added a pink Bobino slim pen, which is great. I got it as a Christmas present from my cousin this year, and I absolutely love it! It doesn’t get lost in my bag and it’s so slim, you can hardly notice it’s inside the diary.
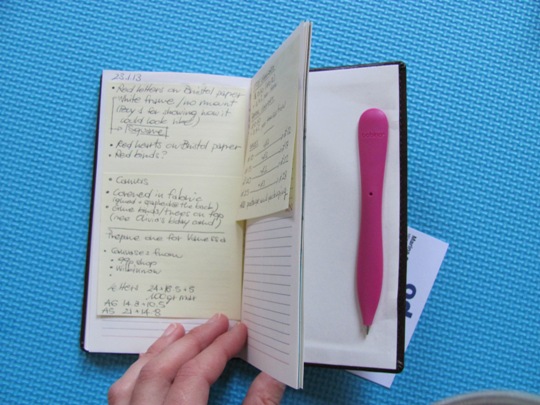
The diary is just a diary; I use it to record my daily appointments, birthdays, holidays, grocery lists. I could easily replace it with an online calendar, but let’s face it; I just need another excuse to use a pen and some paper!
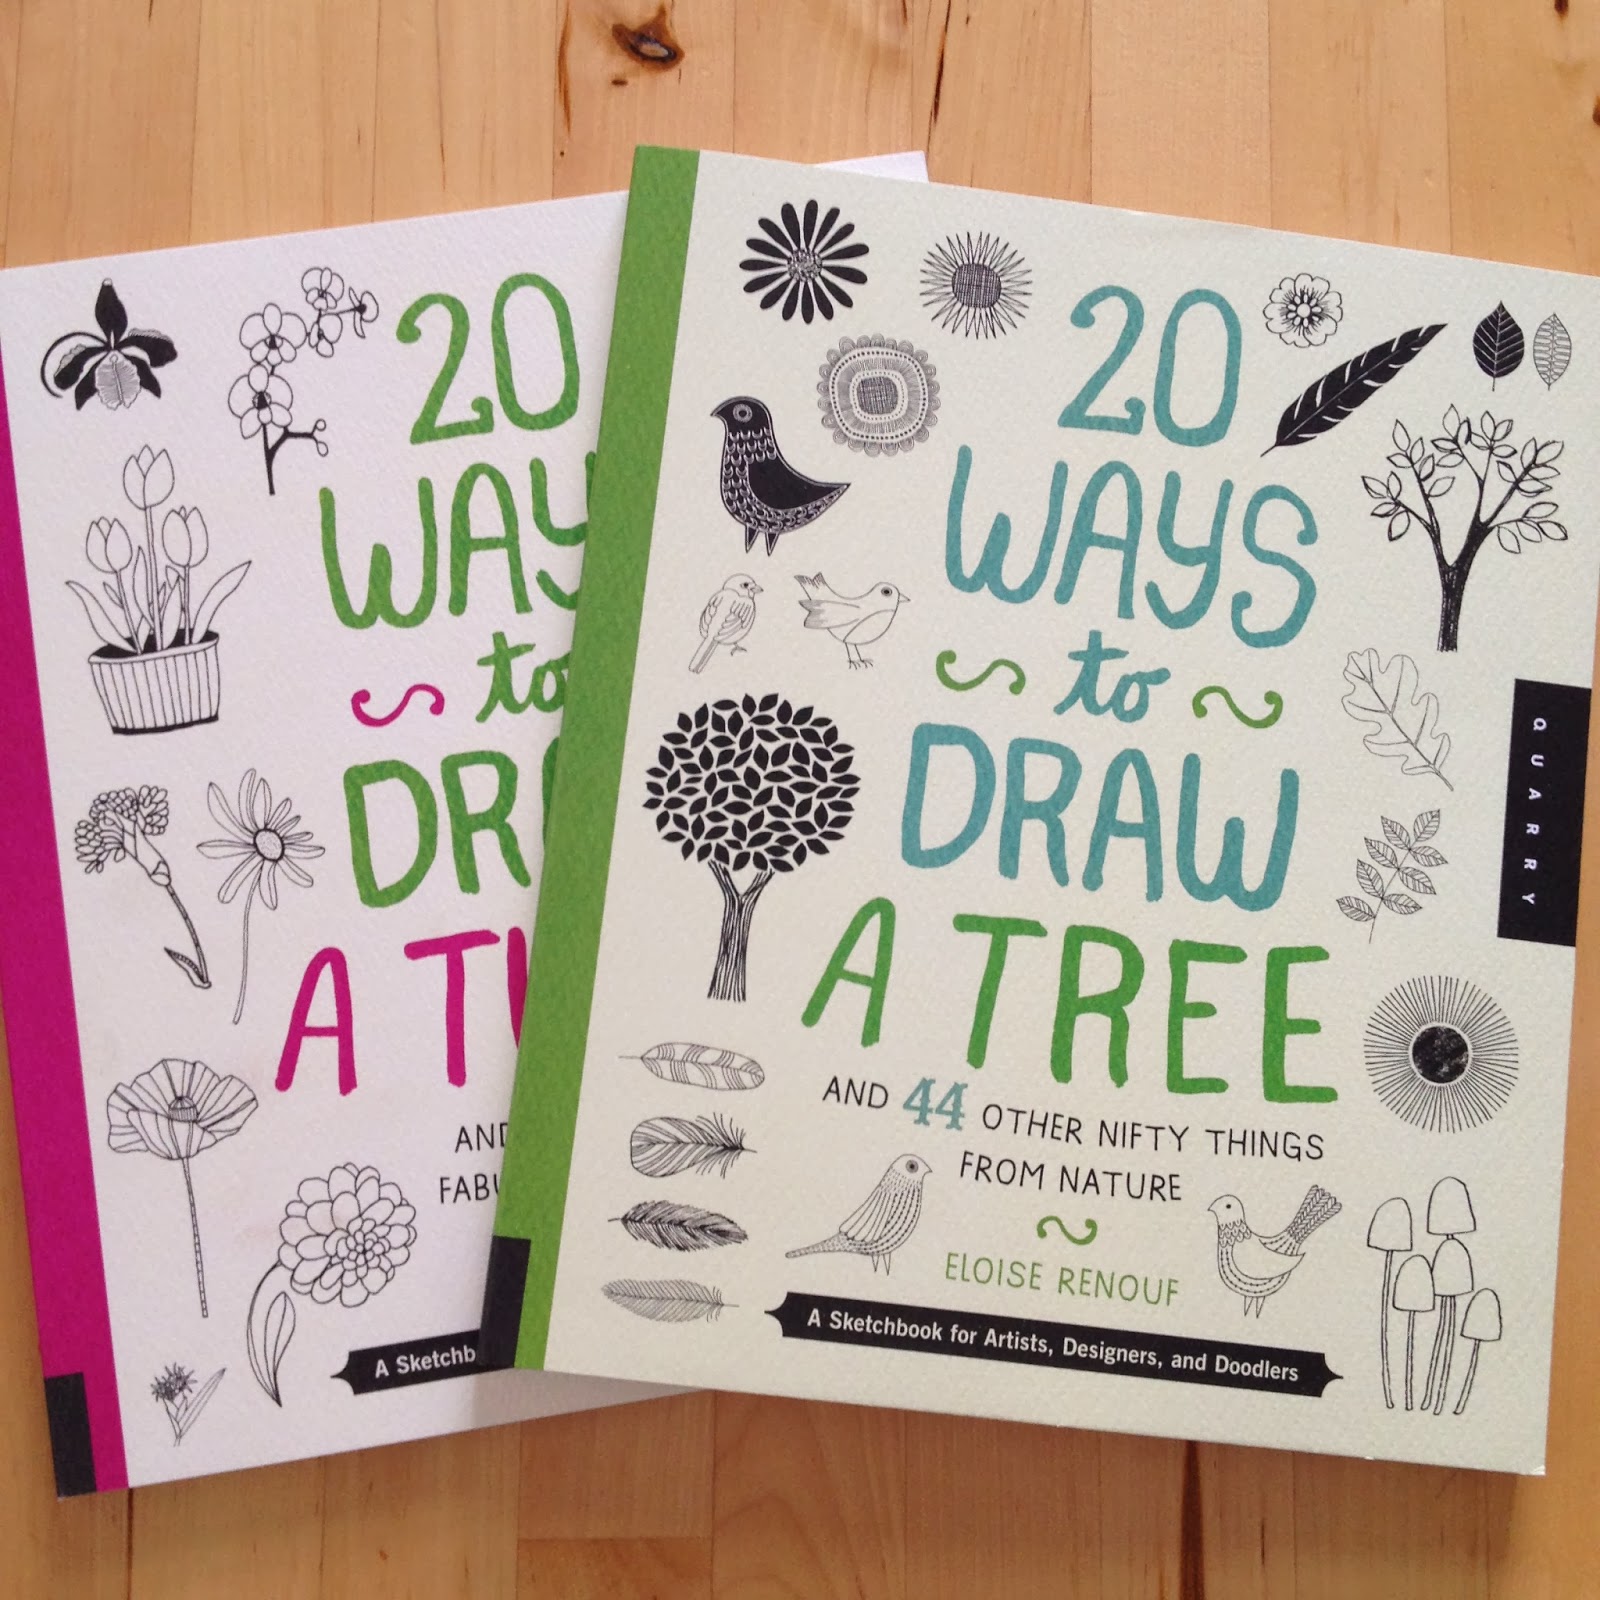
I always carry around a sketchbook with me. I hold an extensive collection of sketchpads which I have going at the same time, but tend to use in different occasions.
They have been around for quite some time now, and one of my last year goals was to complete all of them, one by one. This is still an ongoing project, and it is proving a slow process, but the biggest motivation for me to complete it, is that I’m not going to buy any new sketchbook until I’m done with the old ones. And believe me, I already have a long list of new paper pads I’m dying to get my hands on.
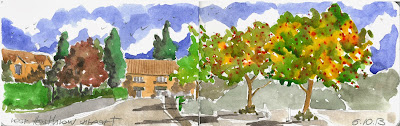
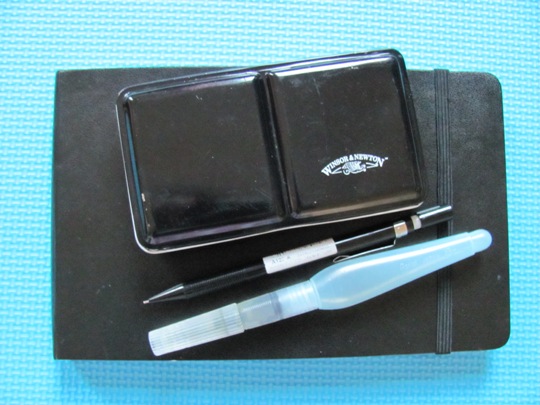
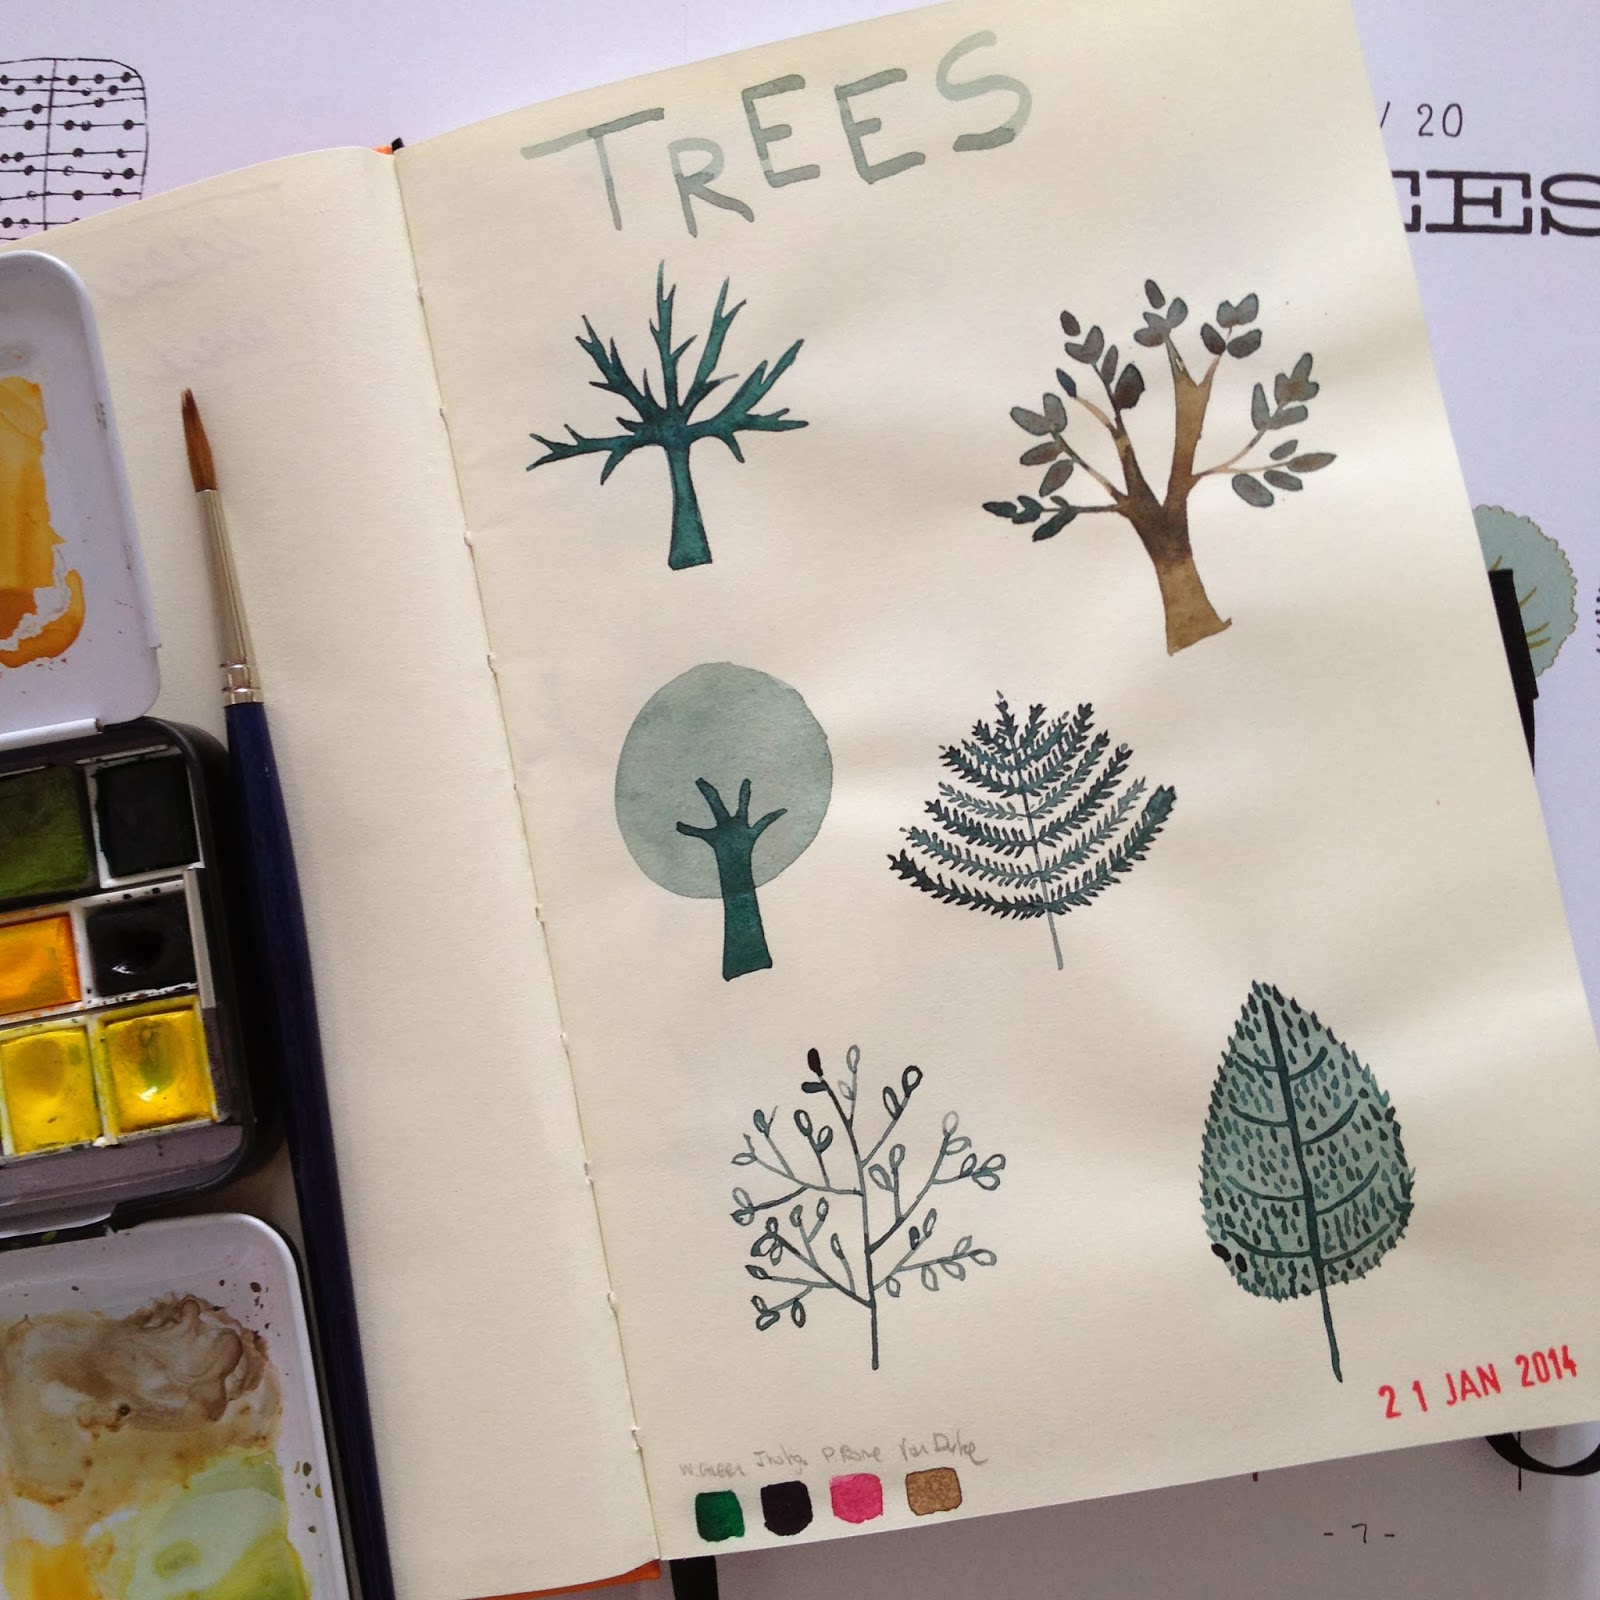
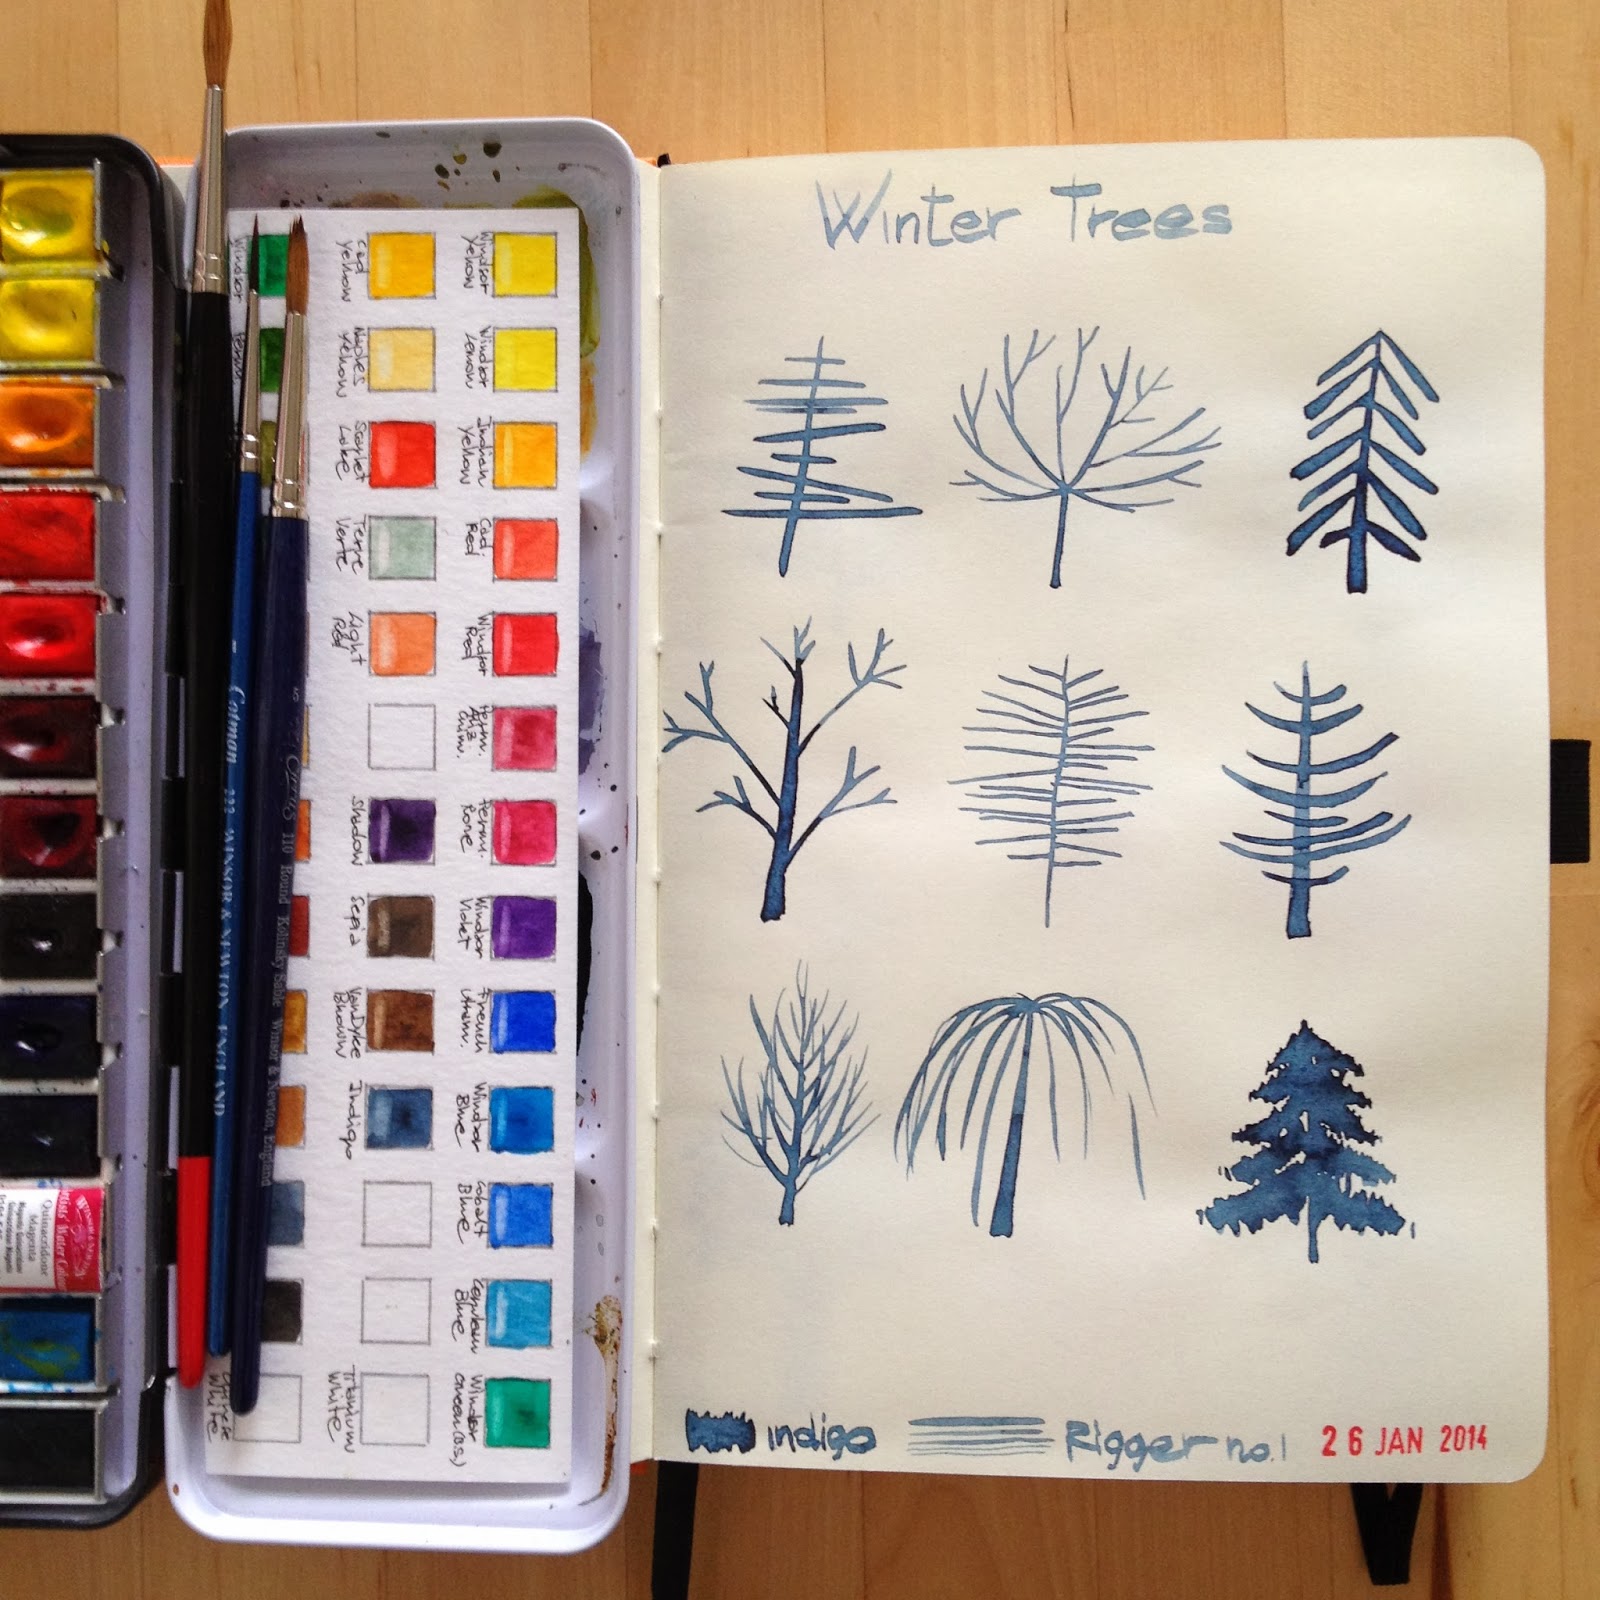
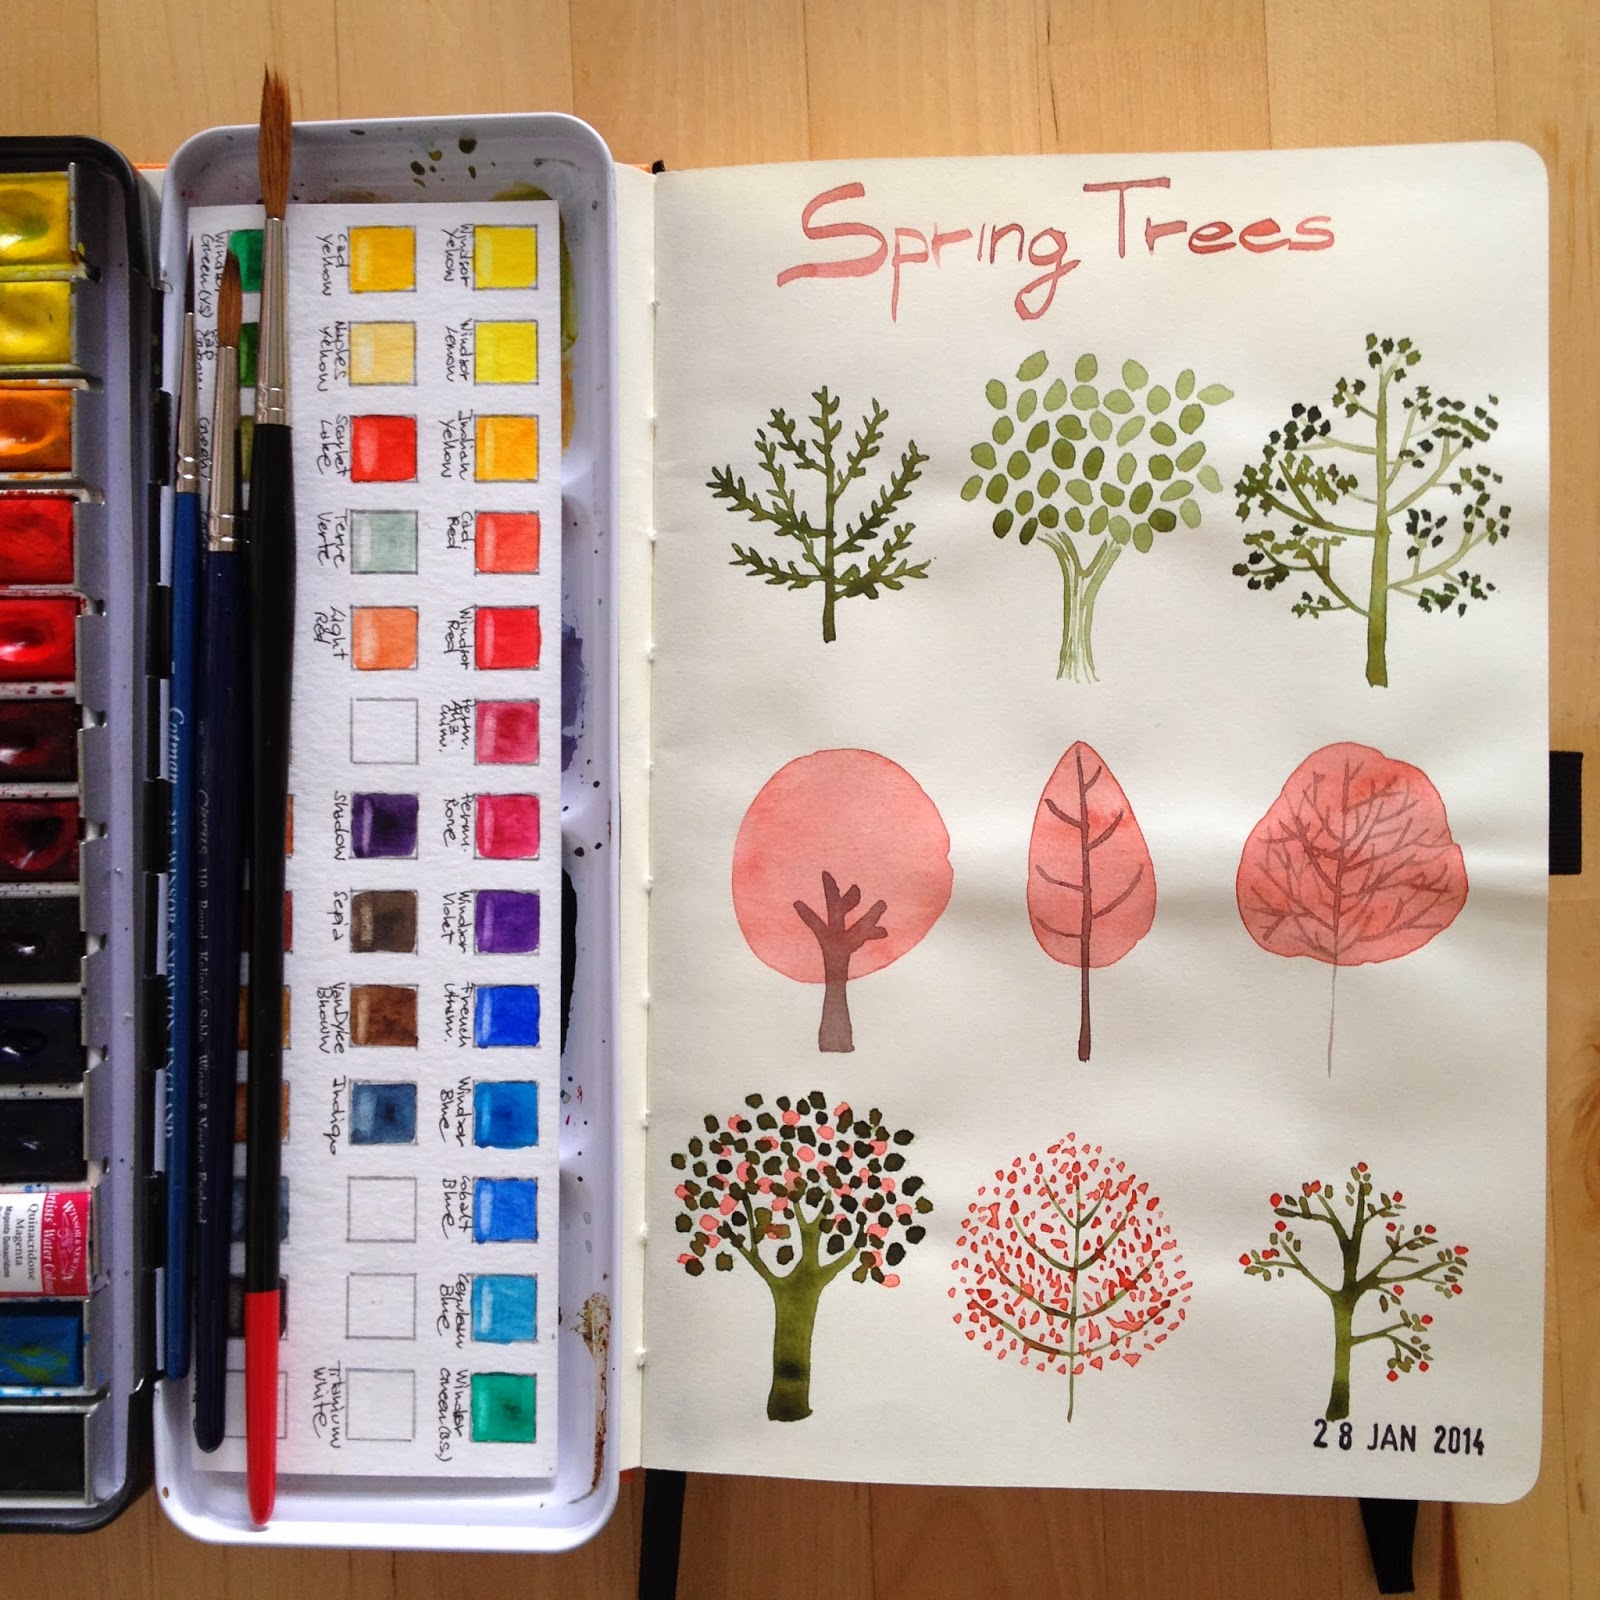
The sketchbook that I’m currently using is a 
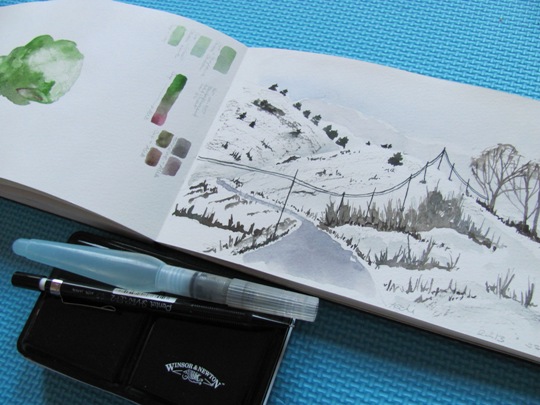
Moleskine watercolour notebook (13×21 cm, 200gr cold-pressed paper). It has a hard cover which is prefect for sketching on-the-go and has a useful inside pocket at the back, which I use to store some extra paper and a sheet of paper with swatches of watercolour pencils.
(Those little fingers on the left side had some fun using the above colour palette) 
Along with the sketchbook, I carry, as a minimum, a pocket size Windsor & Newton lightweight half pan box containing 12 Artists’ Water Colours, a medium size Pentel waterbrush and an HB mechanical pencil.
This kit, although minimal, is not as light and small as I’d like, but is utterly necessary, so I can’t really complain. It’s always in my bag, I take it with me every day; you never know when you may get some spare time to draw, better be prepared!
To make things less easy this year I have added a new notebook to my carry-around essential kit.
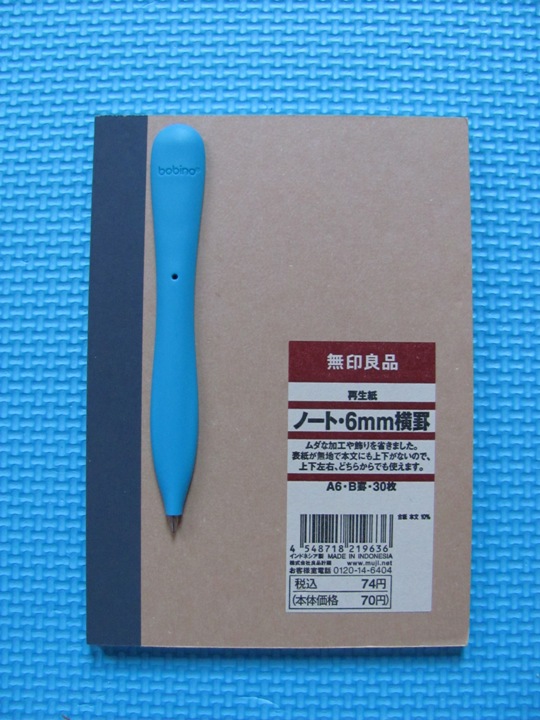
It’s a lined B5 notebook I bought about 3 years ago from Muji (similar to this one) and never found the right use for it. It has about 30 pages and it’s very very light. I’ve combined it with a turquoise Bobino slim pen and I use it to take personal notes, jot down ideas, make plans, write down to-do lists. It also goes along very well with my small post-it notes, which somehow I tend to use very often and that get stuck around all over the place; now they have a special place to go to.

 We are almost at the end of February now, and so far my 2013 carry-around set has been working perfectly. It does the job, it gives me the chance to make a physical record of my day, my ideas, my emotions. All three notebooks are very personal to me, and apart from the sketchbook, which I share on this blog and Flickr from time to time, the rest mainly remains private:  they don’t need to look pretty and this gives me the freedom to do with them whatever I feel like, they represent the true me, without any artefact.